

Table of content
You can add leads or companies from search by filter inside GetProspect.
It sources data from the GetProspect B2B contact database with 800M+ contacts, 70M+ verified business emails and 47M+ companies, and you can also collect leads on LinkedIn with our LinkedIn email scraper Chrome extension.
First of all, got to the Search page.
Before starting the search, decide what you want to search for: leads or companies.

Search for leads
Apply the filters
Now you can choose the search criteria. You can search leads by the following filter groups:
- Duplicate Control
- Location
- Job Title (with Department and Seniority)
- People
- Company
- Industry
- Employee Headcount
- Company keywords
- Type & Business Model
- Founded Year
- Select Per Company
- Time in Current Company
- Time in Current Role
- Job Change
- Contact Details
- Lists
In Duplicate Control, you can hide people you already saved, exported before, added to another list, or whose details you already revealed, so you never pay for the same contact twice.
Choose the Location - a region, country, state or city. You can filter by where the people are located or by where their companies are located (optionally headquarters only), and exclude specific locations.
In the Job Title filter, input the titles you want to search for. You can input multiple titles, add them in bulk, exclude specific words, choose between a “contains” and an exact match, or build a Boolean search.
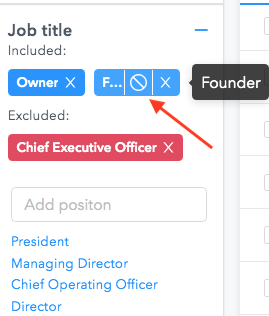
In the same group, pick the Department (e.g. Sales, Marketing, Engineering & Technical, Finance, Human Resources) and the Seniority level: Owner, Partner, Chief Officer, VP, Director, Senior, Manager, Entry, Intern. You can also exclude any of them.
In the People filter, search for specific people by name or LinkedIn URL.
In the Company filter, input company names, domains or LinkedIn URLs. You can also exclude companies, or upload a file with a list of companies.
You may choose the Industry - a whole category (e.g. Software & Internet) or specific industries inside it.
Specify the Employee Headcount - a preset range (from 1-10 to 10,001+) or your own minimum and maximum.
In Company keywords, input words to look for in the company’s specialties, social media description or website pages - for example, the name of a tool your prospects mention.
In Type & Business Model, choose the company status (e.g. Privately Held, Public Company, Non Profit, Government Agency), how it sells (B2B or B2C) and its revenue stream (e.g. Subscriptions, Product Sales, Professional Services).
In the Founded Year filter, you can select the time period when the company was founded.
With Select Per Company, limit how many people you get from each company.
Time in Current Company and Time in Current Role let you find people by how many months they have spent at their company or in their position.
In Job Change, find people who recently changed jobs: any change, a move to a new company, or a promotion, within the number of months you choose.
In Contact Details, tick Email found to see only leads with a valid work email.
In Lists, include or exclude people who are already in your lists.
Saving the results
Once you apply the search filters, you will be able to preview the first 100 leads(Free plan)/2500 leads(Paid plans) that match your search criteria. You can see the Contact column with the full name, job title, location indicated, and the Show email button. In the Company column, you can see the company name, industry, location, and employee number.
To see the email address, you can click on the Show email button.
Once you click the Show email button, the email address will be revealed and saved to your account, and one credit will be deducted from your monthly quota. The lead will be saved into All contacts.
After you click on the Show email button, you will see three icons next to the contact's name. When you click on the envelop 📩 icon you will be able to view saved email in case if you need to copy and use it right now. The phone icon 📞 allows you to search for the phone number of this particular contact, the phone number will be revealed and saved to the contact’s profile in your account. You will be charged 1 phone number credit for a found phone. The list icon 📄 allows you to assign the contact to a specific list. 
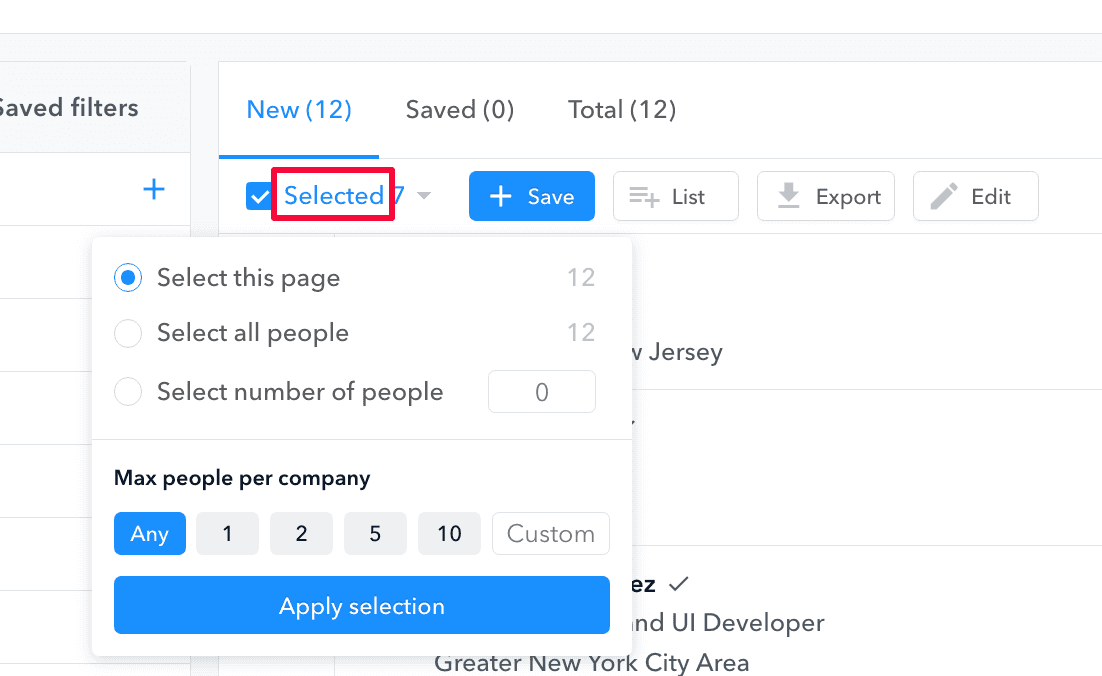
You can also save leads in bulk. For that, you can select the contacts that you want to save using the checkboxes on the left side. After that, you can configure saving of the contacts:
- Click on Selected to view the options on the number of total saved leads and leads per company;
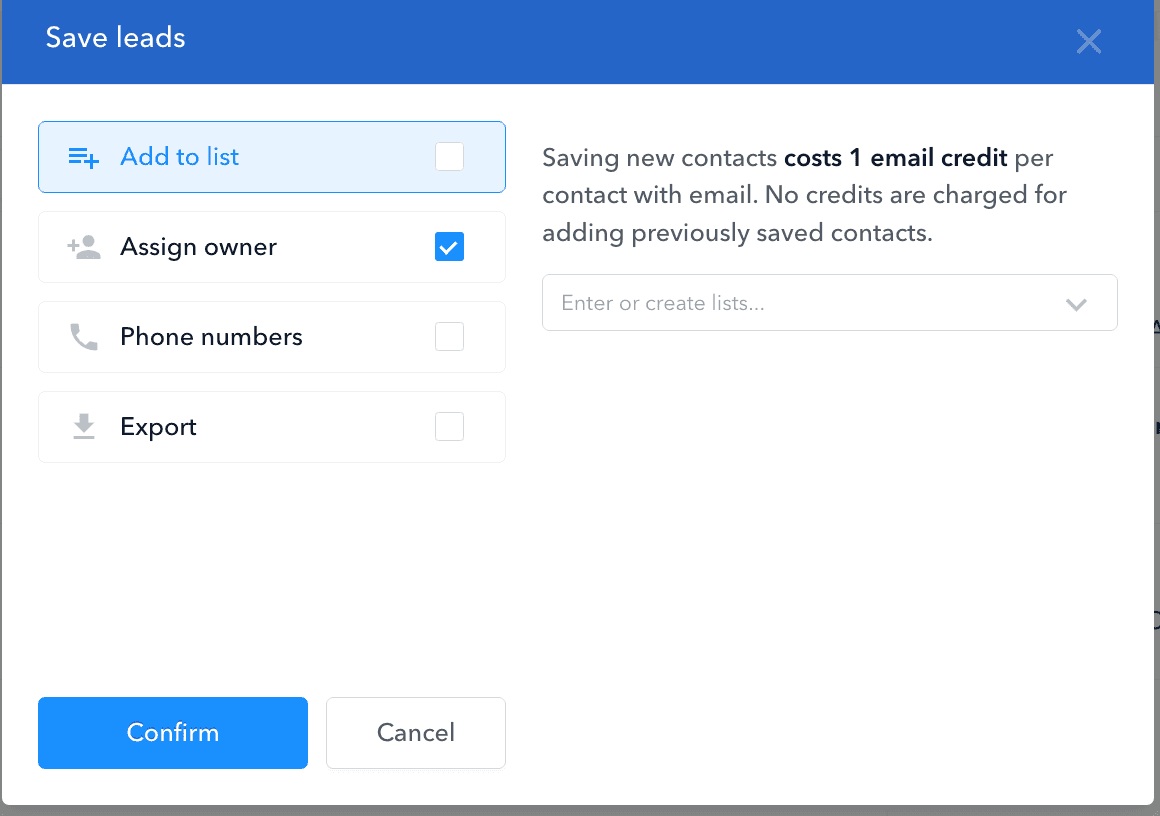
- Press Save to set up the final parameters for saving the contacts such as Lists, Owner for contacts, whether to save phones along with emails, and whether to export the saved contacts in the file form right away.


Search for companies
To search for companies, first select Companies tab.
You will see the following filter groups you can fill in:
- Duplicate Control
- Company
- Industry
- Employee Headcount
- Location
- Company keywords
- Type & Business Model
- Founded Year
- Lists
They work the same way as the company filters in the leads search.
Once you apply the search filters, you will be able to preview the first 100(Free plan)/2500(Paid plans) companies that match your search criteria. You can see the name, domain, headquarters, industry, size, and description.
To save the company, click the Save button on the right of the company’s data.
Note: You have a limit of saved companies per month. This limit equals the number of your current available credits multiplied by 4. For example, you have 50 credits in the freshly updated free plan, which means you have 50*4 = 200 companies per month. However, if you used 5 email credits you can save 45*4=180 companies till the end of the month.
You can also save companies in bulk. For that, you can select the companies that you want to save using the checkboxes on the left side. After that, you can configure saving parameters in the same way as for contacts.
Saving the searches
You can save any search to come back to it later and perform it again in the future without filling in the filters again.
For that, once you apply all the necessary filters, click the search history icon in the top right corner.
There you can select your current search or one of the past ones and choose the Save option. After that you can give a name to the saved search.
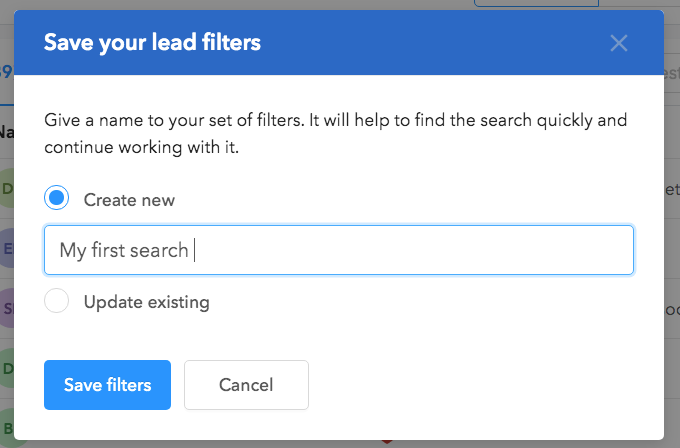
Once you enter the Search section, you can see your saved searches on your right.

In case you have collected 90% of leads from a certain search, we will notify you in case if we have new leads associated with filters from that search. A notification email will be sent to every new 100 contacts.